Sunday, December 14, 2008

Photographing a miniature

I woke up today, with a layer of snow over everything. So, what was the first thing that came to mind? PHOTOGRAPHY! So, this one is pretty weird, I will admit. I have been wanting to photograph this miniature for a while. It was painted by a friend a few years ago. It looks very good, even after a LOT of use. I think that the shield shows off his quality amazingly well. That is all done free-hand.

So, I figured the light clouds, and all the white snow would make for VERY even lightning. It turned out right. My first pictures, put the miniature on the right side of the frame, and it really looked weird. I moved it to the left of the frame, and I really liked it. After a touch of cropping I came up with these two pictures.

My girlfriend suggested bumping the exposure a bit, and blowing out the background. That probably would have been a bit better, though, I am still very happy with these pictures.


Miniature - Front

Miniature - Shield

Riftair Shot 3

Wednesday, December 10, 2008

Books, Books, and MORE BOOKS! (Very Long)

In a forum I frequent, someone asked about what books we suggest for learning photography. After listing all of my books, and giving a quick critique, I thought it would be good to add here, as well. So, without further ado, here are the books I have and recommend, as well as a few that I have my eye on, and would love to read. These books will be digital centric. Not film.

So, for the first book... this is a very important position. Three books jump out at me, at once. I guess I will start from the more basic, to more advanced.

For the absolute beginner, I would have to go with BetterPhoto Guide to Digital Photography. This is a good book for people with digital cameras. Be it point and shoot, or SLR. There is a lot in here that will be covered later, but it is a great primer. Very easy to read.

For the next one, it is actually a 2 book set. I would recommend Scott Kelby's Digital Photography Boxed Set. When I bought it, it was 2 separate books. Now, you can get a single gift set. The books complement each other very well. This is a more basic book, with advanced sections. That is not quite right. He tends to tell you what to do, and less HOW to do it. The end sections I would love to see him come out with, as flash cards, that are weather resistant. Once again, it is more of, do this... and this is how you do it. Very cool concept. Scott Kelby is pretty much a god, when it comes to digital imaging. He also has a GREAT sense of humor, which makes reading his books excessively easy.

For the next book, I would recommend, I would have to go to Understanding Exposure. This is one of the more popular books that I have seen. Amazon is showing 484 customer reviews at 4.5 stars. I think that alone, is a testament to this book. I find Bryan Peterson books, easy to read. This book goes in depth about creating "artistically correct" exposures. You can create several pictures of the same object, using different exposures. They are all technically correct, but there is only one artistically correct exposure, for you. It is a very interesting concept, and something that he follows through several books. He also goes in depth about the interaction of Aperture, ISO, and Shutter Speed. This a very KEY aspect to photography.

Those are three GREAT books, to get started with, learning photography. I recommend them all.

One other book, that is good in its own right, but I don't think it is quite up there with the other three, is another book by Bryan Peterson. This one is called Understanding Digital Photography. The reason I show some hesitation on this book, is that while I really like it... some of the advice seems to be a little off. For one, I would not recommend blowing out your sensor with compressed air. Just a few minor issues, in a technically good book. Once again, Bryan Peterson is a creative photographer, and you can see his love for the medium shine through. His pictures that go along with the concepts are spot on. This one is pretty much interchangeable with the first book on my list. I think the Betterphoto book, is just a touch better on the beginner book, though.

The next book is my final Bryan Peterson book. This one is Learning to See Creatively. Learning to See Creatively was the first photography book I purchased. I was able to read it all, cover to cover, in one evening. It is not difficult to digest. Lots of pictures. This one, more than all of my other books, really OPENED my eyes to the creative side of photography. (I am kind of a tech-head, so come to photography with a VERY tech, look. Not as creative). This book will always hold a special place in my heart. It is also the book that pushed me into getting my first dSLR camera, since all of the sudden my Point and Shoot was holding me back.

Now, from here on out, I am going to be talking about books that speak to my favorite aspects of photography.

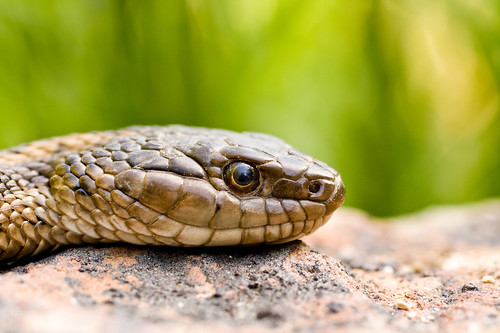
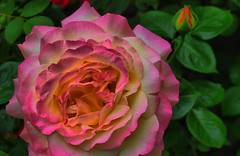
My first "love" in photography, would have to be macro photography. I love doing it. I question if I have the patience at times to do it WELL, but I truly do love it. So, I have picked up two books on the subject. The first one, is Digital Macro Photography. This is done by a younger gentleman. I think he needs to refine his writing style a bit, but he does a good job of explaining concepts. He has some truly outstanding pictures to illustrate his points, as well.

The next book that I have, is John Shaw's Closeups in Nature. I know that John Shaw is one of the top writers in photography, but I just have some troubles recommending his books. The pictures themselves are QUITE stunning, but I am not a big fan of his writing style, and these books are a DEFINITE throw-back to the film era where he talks about film selection for different pictures. Just not my bag of tea. And quite honestly, god I am glad I don't have to shoot film!

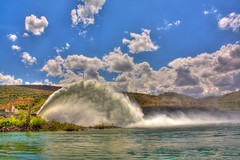
From there, I will take you into another aspect of photography I love, HDR, or High Dynamic Range photography.

The first book I want to talk about is Complete Guide to High Dynamic Range Digital Photography. I think the title is misleading. I have another HDR book, that is much more complete. I would say this would be better called HDR for everyone that wants to learn how to shoot HDR. :-) This is really a great book. Awesome examples, and several different ways of looking at things. HDR made easy. I REALLY like this book.

The second HDR book in my collection is The HDRI Handbook. This one really does fall under the "complete" category, more so than the title above. This one is VERY complete. It is more complete than what I have been really interested in, though. There is some VERY good information on where HDR came from, and a LOT more technical background. I found it a bit dry to read though. I know this is a bit rough of a review, but I want to temper it by saying that this book is VERY good. VERY technical, and definitely a great addition to my library.

This last book is one that I am still not 100% sure about. It is called The Photo Idea Index. This book gives you ideas on how to shoot pictures. TONS of different ideas, and pictures to back them up. It doesn't seem to be technically, that great. But, it is GOOD when your brain is in a slump. I REALLY like the "flash cards" in the back of Scott Kelby's two books, and I almost feel that this BOOK is a lot like those. I have a hard time recommending this book, because it is odd. It fits in a weird spot, though, I wouldn't give it up, and am happy I own it.

So, those are books on Photography. I have a few additional books that go along with photography. These are books on post processing. The first one I got, was Photoshop Elements 6 Missing Manual. A bit dry, but a GREAT manual. I had it get wet, and ruined, so I have not read as much of it, as I would have liked. The other Adobe Elements 6 book I have is Photoshop Elements 6 for Digital Photographers. This is another Scott Kelby book. This one TOO was ruined in the great flood... but I have re-purchased it. It is not as technically complete as the missing manual, but it more than makes up for it by being REALLY easy to read, and has great illustrations.

My latest book on post processing, is another Scott Kelby Book. It is Lightroom 2.0 for Digital Photographers. This book is VERY much like the Photoshop Elements book in look and feel. It is a must-have book for any LR2.0 user.

Once I am able to get some more books, I have several on my list. They range from another Bryan Peterson book, kind of Understanding Exposure 2, to more specialized books on low-light, portraits, landscapes. What I am planning on getting, coming up are:
Understanding shutter speed
Beyond Portraiture
Night and Low Light Photography
Understanding Close-Up Photography
Digital SLR Expert Landscapes
Low Budget Shooting
Working with Light
The moment it clicks

I think it would be difficult to really read a book, and look at someone else's photographs, and not come out with further insights in how to take pictures, or how to see the world, in that slightly different way. How to see light, even more so than the scene. I think that is what these books help you to do. Garner further understanding of light, and photography.

Finally, books are fine and all, but if you want a great photographic experience, check out Art Wolfe's Travels to the Edge on your local PBS station. Getting someone like him to talk about photography, and those items that surround it, and then seeing what they produce is quite an experience. It is available to snag on your DVR, or pick up on DVD.

If you have any other suggestions, please feel free to add some comments.

Sunday, November 30, 2008

KT Life Studios is now Live! Portraits, Fine Art, Stock and more.

I have dabbled in stock photography, as you have seen. I have even shot a few events for a friend. But, it is FINALLY time to make the big move. Tanya and I have set up a new website at KT Life Studios for Portraits and fine art. We are VERY excited to start this new photography studio. We are offering portraits, some of my fine art prints, and assignment photography. I will also be opening up a stock photography gallery to sell my stock photographs on. Tanya and I are very excited about this new opportunity to share our art with others.

It's Thanksgiving!

So, my girlfriend is just about the most amazing cook you could ever find. My parents were out of town, so this year, we did Thanksgiving ourselves. We invited a few friends over, and cooked up the full spread. I fired up my smoker, and smoked a pork shoulder, Ham, Beer-can-chicken, 5 turkey legs, 1 large summer suasage, and 4 heads of garlic. It went GREAT. My girlfriend now knows WHY I love to smoke. It is so damn tasty. So, to compliment the meats I was cooking, she did a green bean casserol, deviled eggs, some amazing mashed potatoes, some equally amazing sweet potatoes. So, after having this amazing spread, it was time for me to take some pictures. Food photography is something I have never done before, and I didn't really set it up. This is just how it came to the table. I was very happy with the results.

Mashed potatoes.

Mashed Potatoes.

Sweet potatoes with coconut

Sweet Potatoes with Coconut.

Spiral cut ham, another view.

Spiral Cut Ham, smoked and glazed.

Deviled eggs

Last but not least, no Thanksgiving is right, without Deviled Eggs!

Friday, November 21, 2008

i Make Decisions (iPhone and iTouch) is up on Idahostatesman.com

I thought some people may find this of interest. My old boss's app, iMakeDecisions, is featured on Idahostatesman.com. This is pretty cool. It says he reached the top 100, which is HUGE for the application. I wanted to pass this information on, say congrats! Now, this needs to get moved over to the Android platform, for the Tmobile G1. :-)

Wednesday, November 12, 2008

Night time HDR.

Here is my latest picture. The sky was dark, and the moon was peeking through the clouds. The backlight on the clouds added texture, giving the sky a deep texture. I shot the picture through skeletal branches, giving it a more eerie look. Those pictures were ok, but when it was combined in HDR, I think the picture really popped. It creates a very spooky feeling, getting a broader dynamic range.

HDR moon at night.

Tuesday, November 11, 2008

Pick a winner, make a decision: i Make Decisions for the iphone and ipod touch from Apple.

I have a friend that has released a new iphone/Itouch/Ipod Touch application called i Make Decisions. The site is iMakeDecisions.
i Make Decisions is a GREAT program to help you through those rough patches in life. When you reach a fork in the road, it is always better to let the winds of chance decide, since they will not let you down, unlike your cluttered thinking. That is where iMakeDecisions comes in. i Make Decisions has a bunch of decision making applications, in one. The program includes Magic Eight Ball, Coin flip, random number generators (for you web designers out there, get the creative muse jump started with a random color generator), wishbone, rock paper scissors, will it stick, darts, random card, which way, spinner, and stats for some of the pieces. This thing has it all. And, making effective decisions is ALWAYS a good place to start!

So, if you STILL want more information, you can check out the press release at http://pitch.pe/1253.

You can download i Make Decisions through the website, or click on this link which takes you right to the apple store.

I am good friends with the people that made this app. They are some terrific guys, that definitely deserve the measly $1.99 for this app. You will easily get more use out of it, than that little bit of money.

Saturday, November 8, 2008

Finding the moment...

I am sure most readers have been told about the golden hour. That one hour period just after sunup, and just before sunset, where the world is bathed in a magical, golden glow, softer shadows are present, basically, perfect light for photography. So, looking for "The Shot", I went out driving recently, into the farmland about an hour west of where I live. The night before, I was a LITTLE slow getting out the door, and there was an amazing sunset that I missed. I got out earlier this next day, unfortunately, the amazing sunset of the night before, was not there this night. But, I drove around, looking for angles, and looking for interesting pictures.

Photography does an amazing thing to one's way of thinking. You quit looking at things, and start SEEING things. How the light plays across the sky, or a dropping sun bottom lights clouds high up above your head, even though it has dipped over the horizon. How the "feel" of a room is completely changed, by a coat of light green paint. It has been a truely eye-opening experience. So, I have driven out in this area all my life, yet never SAW the area. I am now looking all over to find fun and interesting things to shoot. Unforutnately, I found out where I went, at least initially was pretty dang boring.

After that false start, I found this little area. First, there was an old, small cemetary. Maybe two dozen grave markers were there. It was just a small plot, in the edge of a field.
Farm Cemetery


After I found this, just down the road, was an old church. The cross laying against the side, with the shadow of an old basketball hooop I found to be a great contrast. Also the front of the church, showing its age. The weathered, serene church comes from a different time. A church that has seen generations.

Old community church, with a cross

Old community church


As the sun went down, I couldnt find a great sunset shot. I was disappointed in that. I continued to drive around, looking for some fall color, to come back to. I had not been out to lake lowell, since I was a child. So, I decided to follow the signs to go out that direction. I ended up coming over a hill, and was presented with a great shot of colors along the side of the lake. Unfortuantely, the light was too low for a decent shot. It was VERY bland. I continued driving around, scouting for some more spots to come back to. The darkness was closing in, and my photography was over the night... at least, until I came around a corner, and saw this amazing color.

Avian serenity

Lake Lowell at twilight

Lake Lowell at twighlight, orange emphasis

I was amazed by the color. I used my XSi's live view. By moving the reticle, I changed the look and feel of the color, by changing where I was looking at, for exposure. I took a bunch of pictures here, and they pretty much all turned out perfect. The ones I posted, were just a little MORE perfect.

On the way home, I came across an interesting intersection, and had to get a picture of it.

Chicken Dinner Road


Finally, on the way home, I had been wanting to get a panorama shot of Boise, at night, which I did.

Panorama of Boise after dark.

Tuesday, September 2, 2008

It's been a while, more High Dynamic Range (HDR)

This poor blog is really looking neglected. I have a post I want to do about a couple of photo shoots I have been wanting to do, but I have not gotten around to them yet. So, instead, I am going to show off some HDR, instead. Honestly, I LOVE HDR. I like the saturation affects, the most. You can get such a wide range of color, in the simplest subject, like this bottle, found by the side of the road:

HDR picture of a bottle found on the roadside.


I love the depth of color. When looking at the properly exposed photo, the bottle is VERY flat and lifeless. The addition of HDR, in this photo, adds a depth that is just missing from conventional photography.

Next up, is one of my new favorites. We were taking a trip to my cousin’s wedding in California, when my 3 year old daughter pipes up and tells us that she has to go potty. There was NOTHING around. This was a VERY desolate piece of road in Oregon, so we pull over on the side of the road in a turnout. She tries to pull her pants down, and go, but has trouble going without a toilet. But, we took advantage of the stop to walk around a bit. I took advantage of it, to take some great shots. The sky was very pretty, with those feathery clouds. I put my circular polarizer on, to get some nice pop to the sky. I then set my camera to Auto Exposure Bracketing. I set the camera on my car, and fired off 3 pictures quickly, trying to keep shaking to a minimum. This was a VERY simple shot to do. Just loaded it in photomatix, adjusted a few sliders, until I was happy, and rendered it. I then cut off a bit of the bottom of the picture, since you could see a piece of my hood in there. That was all the processing this required. I love how it looks:


Desert Vista in HDR


I just love how HDR can take a mundane photo and it then just pops out at you, when processed correctly.

Wednesday, June 4, 2008

First official "photo shoot".

So, my company was having a volunteer appreciation event last night, and I noticed that our normal photographers (from the art department) were not present taking pictures. So, I volunteered my services. Since it was the difference between NO shots, and my shots (being completely untrained, and untried) they went with me. :-) It was pretty neat. I ended up shooting 150 shots, HOPING to get some good ones.

The problem, is that the light was BAD. I do not have a lot of experience running my camera at high ISOs, so I kept it at 400, and hoped for the best. I learned a few things. Taking pictures of people talking, I SHOULD have run it up to 1600. They just did NOT turn out well. Even with the flash (which I used EXTREMELY sparingly, to prevent distraction). When you have a presentation going on, especially something SERIOUS, people sit VERY still. THAT is the time to crank the ISO down, and take shots of the audience. I also came to LOVE live view on my camera. When shooting macro, and landscapes, I use live view a lot, but in this setting is really rocked. I was told today, that the pictures were very well done, and they were impressed with the level of focus on some subjects. So, here is my secret. I used live view, with a remote shutter release, to prevent camera shake. After live view was up, I would compose my shot. Then, I would move the focus square over the person, or area I wanted in focus, and hit the magnify button. That would REALLY magnify the subject, and I would manually focus on that person. From there, it was as simple as putting my remote shutter release in front of the camera, hitting the shutter button, and the picture was taken.

Most of my shots were with a full tripod, with the head part extended to my eye level (6'). It was pretty wobbly, so I tried to avoid touching it, as much as possible. After taking pictures for about 2/3 of the event with that, I went up stairs, and lowered the head all the way back down, to try and get some more stability. I then shot down on the audience from above. I got some good pictures there, with my wide-angle lens. Once I came back down, I started shooting with the collapsed head, so I was taking pictures from just above the audiences point of view, giving me a different, and unique perspective of the event.

So, a few things learned from this. Carry your equipment with you, ALL THE TIME. I got this opportunity, because my camera bag was in my car. (as was my tripod and monopod). When shooting in low light, crank the ISO up. Good, sharp, somewhat graining pictures trump good, blurry, pictures, that have low noise. Move your perspective around. I shot over the audience(from a balcony area), at audience level, as well as some good general shots about a head’s height higher than the seated audience. Move around. I literally shot, throughout the night, in about a 180 degrees from one side to the next, carrying my tripod with me. I wish I had shot the dinner trays, and other items, to give a better, full feeling to the event. I also wish I had asked the presenters to each walk back with me, so I could get a GOOD picture of them. Finally, I wish this had been "planned" and I could have gotten there earlier. I was one of the last ones to eat, and finished JUST before the presentation. I volunteered to shoot, while in line, waiting to get my food. It did NOT give me much time to get stuff together, and ready to shoot. Finally, I needed a better tripod. I have that now (yea me). That should help greatly, in the future.

It sounds like I did a good enough job, that the art department is looking at using me in future photo shoots, like this. That is kind of exciting.

Tuesday, June 3, 2008

A lucky shot : snake on a rock

I took the daughter to Kathryn Albertson Park, our favorite stop for taking pictures, and walking around. I love to go into Eyrie area, and look around. Yesterday, there were 4 turtles on rocks in the pond. As luck would have it, there was also a snake laying on the rock, by the edge of the water. I slowly snuck up on it, taking pictures, knowing it was going to bolt. Imagine my surprise, when it never did. So, I ran off, and grabbed my macro lens out of my pack, to take these shots. At first, I thought it may be dead, though, after a few more shots, I noticed that it was starting to move, and get agitated. I think what I love the MOST about this shot, is MY reflection, in the snake’s eye. That is just cool. I carry a “bean bag” computer wrist rest to put my camera on, close to the ground. I used that to hold the camera steady as I took the close-ups of the snake. I kind of wish I had taken a few with a smaller aperture, to try and get all the scales in focus. That is pretty much a minor critique on the picture, since I am very happy with it.


Snake up close.

My flickr site also features another picture, with the snake's eye looking forward.

Monday, June 2, 2008

Filters

You know, there are a TON of filters out there. From what I have read, it seem that there is really, only ONE filter, that can't be duplicated in Post Processing. That is the Circular Polarizer. So, that was one of the first filters I picked up. And it does some amazing things to the sky, water, plants, and anything reflective. It makes the world POP for lack of a better word.

But, that is not where it ends, at least for me. I also have a Cokin P filter holder. The nice thing about this, is that it holds up to 3 filters at once, and allows you to use them on different sized lenses. Since my Macro is 52mm, and my other lenses are all 58mm, this is kind of important.

So, for the Cokin, I have 5 filters. The first three, graduated neutral density filters, came as a set, with the filter holder. This allows me to darken the sky, while leaving the ground bright, so I can balance light. Yea, it can be done in post, but it is usually quicker, and (at least for me) easier to get it done on camera. I also have a mid-range neutral density filter. This one, darkens the scene, so I can use a slower shutter speed. So far, I have used it on water, to give water that silky, moving quality. Finally, my last filter is another graduated filter, but instead of grey, to darken things, this one is blue, to give the sky a bit of a pop. Personally, I like a nice, dark blue sky, and in summers around here, the sky turns kind of pale. I am planning on using this filter to make it look a bit better.

My next filter that is kind of fun to play with, is an infrared filter. This allows you to shoot in the infrared spectrum, outside what our eyes can see. It creates a more surreal look to photographs. It is also a “black and white” medium. You convert the pictures from their red-tinged look, to black and white, for the best effect. This filter works REALLY well, in bright sunlight, so while most photographers are running off in the middle of the day, you can continue to fire off pictures, taking advantage of all the additional light.

My last filter, is the filter of controversy. It is the UV filter. Ultimately, for me, it doesn’t do anything. (From what I understand, if you see a “UV haze” in the air, this will help cut it down… but that is not why probably 98% of the people pick it up). Most people use it to protect their lens. A $20-40 filter, getting scratched is a LOT less painful, than a $300+ lens getting scratched. Honestly, I don’t use them much, but one time, I was looking for birds (birds in flight) and wanted to leave the lens-cap off, and have the camera ready to fire. Well, I put the UV filter on, JUST in case. Now, the negatives. These filters are going to degrade your picture. Light is going through more, coated glass. It happens. You also loose light. Depending on the person, these negatives are far worse than the positives. I tend to fit in the middle. If I am in an area, like walking in the park, I leave the filters off. The “danger” level, goes down. It is flat ground, nice paths, and the like. If I am going off the trail, or something, then I put the UV filter on.

There is my little run-down, and primer on filters. There are a lot out there. I hope to eventually pick up an enhancement filter (jeeze, THOSE are expensive) a circular polarizer for my cokin, as well as the other 2 neutral density cokin filters.

testing out IR filter

With this shot, my IR filter JUST came in, and I wanted to test it out. You can see that green comes through PRETTY well. It should be converted to Black and White to really make it look better, but this is basically just as shot, with an Infrared filter


Fountain in the park

Here is a fountain in the park. I used a neutral density filter to slow the shutter speed down, so I could take a picture of the water flowing.


Redwing Blackbird
Here is that same fountain. I was taking a picture of the bird, which moves too much to work will slowed down. So, this is what the fountain looked like, without the filter to slow the shot down

Sunday, June 1, 2008

High Dynamic Range photography

Ok, I admit it. When it comes to computers, I am a GEEK. I love computers, I love twiddling with them... and I love playing with software. I think that is kind of why photography speaks to me. I am not an artist. God, I don't have an artistic bone in my body. Luckily, for me, I can at least SEE art, and the camera allows me to capture it.

If you have spent much time at all, with photography, you will know we have something called the Rule of Thirds. With the cameras themselves, we have THREE distinct settings, used to get the proper lighting: ISO, Shutter Speed, and apature. We take into account the fstop for depth of field. We use technology, to capture art. There are artists out there, that create art, then use a camera to capture it. I will freely admit, I am no where CLOSE to that... but I do like the techy aspect of photography. I have learned how to use ISO to squeeze out a bit better shot, but I realize I am giving up a "clean" image. (due to more "grain" or noise). I have figured out how to use neutral density filters to reduce the light going into my camera, so I can take a longer exposure of a water, to make it look silky. I think I have come a long ways. While I used to actively think about these things, now, it is becoming second nature to a degree. (let’s face it, I have only had my dSLR for just under 2 months, and you can only learn SO much in that time...)

So, for my NEXT geeky move, into photography. It is HDR, or High Dynamic Range imaging. This stuff is pretty cool. There are flickr groups dedicated to it. There is software designed for it (Photomatix and High dynamic Photo) and there seems to be a big buzz about it. It is very cool. While our eyes can see something like 11 "fstops" of range, a picture can pull up between 5 and 7. (I have seen both of those numbers listed). So, our eyes can see a LOT more of a scene than a camera. We can see INTO shadows, and pull out detail, while at the same time, looking over at a bright subject, and seeing detail in there. With a camera, one or both would be blown out, or underexposed, to get a picture. Well, with HDR, we take a series of pictures, and blend them into one. This creates some VERY cool effects, and makes for some very rich pictures. (Peruse the HDR flickr group I linked to above, to see just how cool).

For some reason, my geeky friends love this, as do I. It is, on its surface, very simple. I set my camera to auto-bracket. I fire 1 shot at -1 exposure, 1 at the proper exposure and then one more at +1 exposure. Then, I use one of those two softwares above, to merge it into one picture. I know it is FAR more complicated than that, since Photomatix has 2 settings, one is HDR, and one is blending. To me, they are one in the same (at this point in my journey of knowledge), but, since both are options, I know they are ultimately different.
If you are curious about the quality of the software I list, from what I understand, Photomatix is the most popular piece of software. It is supposed to be able to create the most natural looking pictures. While High Dynamic Photo creates good photos as well… its user-interface is MILES better than Photomatix’s. Ultimately, it depends on what you care more about. Oh, and Photomatix is about double the price of HDP. (as an aside, I bought Photomatix today, to start playing with this stuff, and later in the day, learned about HDP. I doubt I would have gone for Photomatix, because of the price, but if you search well with Google, you CAN find a 15% discount on Photomatix, bringing the price down some)

Now, lets look at some pictures:
Rose processed with HDR, high saturation

This one was processed with High Dynamic Photo. I had 3 exposures of -1.33/0/+1.33.

Macro of a Rose, processed with HDRThis one was processed with Photomatix. I had 3 exposures of -1.33/0/+1.33.

Rose bush

This one was processed with Photomatix. I had 3 exposures of -1.33/0/+1.33.

These are a little different. They were blended, but based on one RAW file. I set one to +1 Exposure and one to -1 exposure saved the 2 files, and then combined them. It was more to test it out. The top one, is "blended" the bottom one was combined using HDR.

Lucky Peak Rooster Tail - Blended

Lucky Peak Rooster Tail - HDR

Saturday, April 26, 2008

Super Geotagged...

One of my interested in photography, is geotagging. It is still VERY much in its infancy, but I found this site called SuperGeotaggec.com. The project is very cool. Grab the geotagged photos, on Flickr, and post them on google maps. You can read a bit more, in the author's origional post. Very cool. I will be doing a future blog post, about geotagging as well, and the trials and tribulations I have had, from it.

Sunday, April 20, 2008

In the darkness, the fun has just begun.

I am sure that everyone enjoys certain aspects of photography more than others. Some like weddings, others portraits, others landscapes. One of my favorites, is night time. There is something magical about light capturing your subject. The eyes are drawn to the light. That is the case of my pictures of the Boise Train Depot. Next up, there are the pictures of Boise, itself. The lights become the subject. In the darkness, you do not really SEE the valley, as much as the lights OF the valley. It is amazing. You get up into the foot hills, the wind, blowing fresh, crisp air over you. You scan the valley for visually interesting lights, or groups of lights.

From a technical standpoint, photography is the art of capturing the light that is reflected off your subject. With the example above, about the night shooting, over Boise, you are capturing the light itself. Figuring out HOW to do that, properly, is a trick. I am ATTEMPTING to capture the vista, in camera, how I want it to turn out, with the least amount of tweaking. This particular shot was shot at 75mm, using f/4, ISO 100 and a 10 second exposure time. A lot of the lights pop MORE than what I want, it was the best of the bunch, the most crisp looking. After I did some processing in raw, and over-saturated some of the colors, I thought that the picture took on a life of its own.

My previous post about low-light, was more concerned with the WHERE to shoot from. This one is more about the why. As I learn more about photography, I get better. In the week between the previous night shot of Boise, and the latest night shot. I have read more, learned more, and upgraded my camera to a Canon XSi. I am pretty sure the biggest change between the previous week and this later week, was a MUCH nicer camera, but that is not all. I noticed with my Canon A650 IS, a LOT of the shots were blurry. This last time I went up, instead of having my tripod behind my car, I put my car between the wind, and the tripod. With the 10, 20, and longer exposures, this made all the difference in the world. It are these little things, that all add up to make a photographer great. I have to look around, and figure out what aspects of a shot I am able to master, and then I try to figure out a method to master them. I am sure that someone with years of experience would have noticed the wind right away, and shielding the camera from the wind, would not have required a conscious thought.

So, I have discovered, I like shooting at night. My other favorites I have discovered are macro, and taking shots of patterns. Finally, I DO love my daughter, as a subject. She is a real ham, and does an amazing job in the front of the camera. Oh, and this weekend, my daughter got her FIRST digital camera. A 5MP, Kodak digital camera I picked up used for her. She had been asking for a camera, to be like daddy for a long time. I look forward to our adventures together.


Boise at night
Boise train depot

Saturday, April 19, 2008

How'd I capture that goose?

I went out last night, and took some pictures of some waterfowl on a local pond. Mainly the geese turned out. I am taking a LOT of "junk" shots to my good shots, still. I had my tripod there, but I still hand shot, trying to get the action better. I think this ultimately hurt me, rather than helped me. There were some pretty birds there, though. I also got to play with my little GPS unit for geotagging. That is COOL. :-) Unfortunately, since the GPS data is saved as a "tag" Elements imported new tags for the pictures. That is kind of a pain. Ok, I will have to do a post, soon about geotagging.

As for the goose. I uploaded the 4 good ones, to my flickr account. I had a gentleman post this in the comments of one of my pictures: "Very clear and full of expression. Sharp point of focus. I have tried to take photos as clean and clear as this but haven't yet succeeded. I can't get my lighting right even with all the extra knobs. Or maybe it's because of the extra knobs????"

I responded with everything I could remember from taking those pictures: "This shot was taken FAIRLY close, using a 300mm lens. (You can see the information in the exif) I barely can figure out the extra knobs, myself. :-) What I did, is set my camera to aperture priority. I wanted as much light in, as possible, and then hoped it would be a fast shutter. There is a local park, that has a the sun shining down it, as you can see in this picture. It was taken a touch before the magic hour of light, but still pretty close, so that gave me the softer light. To hold the camera as steady as possible, I was sitting down, and pulled my arms tight into my body. Oh, I also set my autofocus to the CENTER point, instead of all of the points. It makes the auto-focus lock on to WHAT you want, and seems to be a lot faster. " I am also including a link to my meta data/exif information.

I hope that helps him. This is all about learning. That is the entire point of this blog. Learn and grow as a photographer. What I find kind of funny, is I was planning on going on this date with this lady last night, and we had planned on walking the park. I knew I could get some shots of waterfowl, and hopefully some other wildlife, there. Yesterday, my copy of Popular Photography came in, and had an article about photographing waterfowl. It seemed like AMAZING timing, to me!

And now, a picture of the goose I have been talking about, and my personal favorite of the night, what I call "The Regal Goose".

Regal Goose
The Regal Goose
Curious Goose
The Curious Goose

Sunday, April 6, 2008

Shooting in low-light and night.

Saturday night, we had the sun setting, and clouds on the horizon. I was all excited for a beautiful sunset; boy was *I* disappointed. Well, it wasn’t a total loss. I took some neat pictures of Boise, though, they all kind of suck. The A650 is a GREAT little snapshot camera, but as you get more serious, it has some serious limitations. I would say, THIS is one of them.

As I was returning to my car, I heard a scrabbling sound above me, and looked up. There was a herd of deer up there! I started taking pictures. I fired off a bunch of pictures. I was there long enough, that the herd came down the hill, and went over to the lot I had been shooting pictures of Boise from! It was pretty cool. I fired off 34 pictures, and got 1 that is ok. Most are about snapshot quality. The biggest problem, was shooting in low-light again. I was kind of fighting my camera tonight, on the low-lighting issue. It kept jumping up to ISO800, which is TERRIBLY noisy. Though, the deer were not keeping still much, so running at a lower ISO with a longer shutter, may not have worked well, either.

I started my trip off, looking for the road up to Table Rock. It has been a LOT of years since I last went up there. Even though, I did not find it intially, I did find a cool spot, to shoot from.
After I packed up, I decided to look around to see if I could find where the road to Table Rock was. I DID find it, though, there is now a gate they lock after sundown. On the way back down the hill, I found a great shot of Boise. By this time, it was pretty dark, so Boise was alight, with, uh, light. I took some pictures, and a few turned out pretty cool, though, it could have been better. I tried running at ISO 100, with a long shutter, and that did not work. There was a bit of wind, and I NEVER thought some wind would cause my camera to shake as much as it did.


Saturday, April 5, 2008

Pictures... of paintballs.

I went out today, looking for some pictures. My daughter is with her mom, and I didn't have anything PRESSING to do, so I figured I would go out, and see what I could find. Wasn't impressed with what I found, but one place I went, is where we play paintball in town, down by the river. I was hoping for some sort of animal/wildlife/nature shot, but nothing looked great... too brown, to wintery. Anyhow, as I was wondering around, I kept noticing paintballs, and decided to take some shots, featuring paintballs. I think they turned out ok, though, nothing to write home about. Here are a few shots.


Then, we have a kind of interesting picture. Not GREAT, but an interesting picture none the less. This bridge support is covered in paintball splatters, unfortunately. But, the thing I wanted, was the shadow, cast by the tree on it. After playing with it a touch in Photoshop Elements, I have brought out the shadow a bit more, and really, just ramped up the colors and sharpness. I think it is interesting, but would have been better, if it had been a clean support.

Another Day, another picture.

So, it has been a few days. I have been eagerly watching the reviews for the Canon XSi camera rolling in, and can't wait to see them hit more general release. I have heard rumors of an April 6, April 10, April 27th release dates. Who knows, but they ARE showing up in consumers hands, already.

I finally received my new book, The Photoshop Elements 6 Book for Digital Photographers by Scott Kelby and Matt Kloskowski. My initial reaction to the book, is that it is VERY well done. I have Photoshop Elements 6: The Missing Manual which I like, but I REALLY like this new book. I think, from what little I have read in both books, they will compliment each other very well.

I did something fun last night. Went with a friend to watch a band play, at a local bar. A friend of his, is the drummer. Another guy was shooting some pictures, and was using the on-camera flash. Every time it went off, I thought of the line from Scott Kelby's Digital Photography Book 2. "If you have a grudge against someone, shoot them with your camera's pop-up flash and it will even the score. After I saw him using his external flash some more, I gave him an idea I also read from the same book... to use the bounce card, in the flash, to add some catch-light to the band's eyes. And it worked! Since I am still using a Point and Shoot at this point, a lot of my knowledge is theoretical, in that have not actually USED it yet. I was quite pleased with myself, being able to apply some knowlege that I have learned from reading my books. I try to shoot some every week, but this has not been a productive week. My favorite subject, my daughter, did not want to cooperate the other day at the park. I was kind of bummed. But, she had fun at least. I did get a couple of pictures though.


So, I am beginning to think I am in a rut... I take pictures of my daughter (ok, not so much of a rut there) and flowers... I really need to see more. But, here was kind of a cool picture I took at my parent's house. Flower. It was kind of ho-hum, until I jazzed it up a bit, with a filter I downloaded. I really liked the orange fade across the image.

Wednesday, April 2, 2008

Need to get better at post processing

I have been playing around with Elements for a while now, though, I STILL do not feel... comfortable with it. Sure, cropping is easy. As is red-eye reduction. The auto-fix for lighting is usually spot on. The problem is, are those are all the simple things. I have played around with some settings, and have a kind of cool looking picture of a stack of CDs. As well as a cool Black and white art looking thing of a picture of a tree. The panorama shot, from my first post, was also done in this program, but I had step-by-step instructions to follow, to access it.

Yesterday, I started doing watermarks on my pictures, since ultimately, I would like to sell some into stock photography. That was another thing I had to look up, though, it works almost the same, in paint.net and Elements. So, this leads me into my next topic. What applications do I have installed on my PC?

Right now, I have the following:
  • Photoshop Elements 6
  • GIMP
  • Paint.net
  • Neat Image Great for reducing noise in pictures
  • Picasa
  • Microsoft Picture Manager This may seem odd, but I like to use it to quickly open, and resize files. One gotcha with it, save the file you are editing, but DO NOT save over the original, which it prompts you to do, when you close it. I luckily had a backup of the picture I was working on, when I got hit by this Microsoft "feature".

    Most of my tools were free, or came bundled with another product. Neat and Elements being the 2 I have paid for. There are a lot of neat, free tools out there, if you can find them.
  • Tuesday, April 1, 2008

    The flowers of Spring


    Yesterday, as I was heading back to work, from lunch, I noticed this lone flower in my front yard. I had to get a picture of it. I am happy how it turned out. Nice, "tack sharp" focus. Most images are rectangular, so I went with a square frame on this. Instead of JUST composition, which I am a LONG ways from being any good at, I am also looking at framing of the picture itself. Imagine this on a conventional portrait mounting, with the picture itself, dead center, and about 1/3 of the way from the top. Then, a blank space for about 1/3 and in the bottom 3rd putting the name of the print, or a saying or something along those lines.

    I have Adobe Elements, though, this was edited in paint.net. I use it for my organizer. I am working on getting the tagging to work as well. I was really good at tagging, my last vacation. Every other picture, has been pretty bad, so far. I have the MAJOR people/places/animals in my pictures, now tagged. Working on getting things a little better, to make the tagging work FOR me. That being said, I keep looking at light room and drooling. From what I understand, tagging from one does not carry over. I am honestly, not 100% sure that is true. I hope it is not.

    Monday, March 31, 2008

    First submission to istockphoto rejected

    The turn around was quite fast. I am happy about that, but I am very unhappy with the results. My initial set of 3 pictures, was rejected.

    Honestly, I really only had ONE picture I was really happy with. The other two were two of my better shots, but I don't think they held a candle to the one I shot yesterday in the park. So, I guess I will hold off on my dreams of a stock photographer for a bit longer. I was really hoping I could start selling a couple of pictures to help finance the upgrade to the XSi camera, too. :-)

    I guess about all I can do, is work on my composition, and keep moving forward.

    Sunday, March 30, 2008

    Photostitch is cool, but be careful

    So, Friday, I was looking at Bryan Peterson's wonderful book Understanding Digital Photography, when I came across a picture, showing his daughter in 4 different poses, across a panorama picture. This was pure brilliance. I decided I was going to take my daughter out to do the SAME thing, the very next day. I knew of 2 great spots. One, is the Boise Depot, and old train station, that is very picturesque, the other, just a great panorama of the valley. So, I get all excited. I pick up my daughter, and have my camera and tripod in the car already. We head down to the depot, and it is FILLED with cars. With tears streaking down my face, at my total failure, I go with the spot #2. (Ok, really, no tears were involved, more a sigh, not even a heavy one) We have two scenic over-looks in town, which have GREAT vistas of Boise, as well as the mountains, behind. My daughter and I go past one, to the second one. Low-and-behold, there is a HUGE guard rail in front of it, and I didn't want the panorama of the daughter in front of cement. So, I set up the camera, and get the valley. I make one concession, and for the final frame of the panorama, I have my daughter do 2 different poses, so I could choose my favorite. This monstrosity came in at 13,429 x 2574 pixels. Wasn't exactly what I was looking for, but it worked.


    Now, for where the title comes in. I shot one series, zoomed in. So, I could get a panorama of our snow-capped mountains. Great and spiffy idea, right? Well, I didn't fully realize it at the time, but my camera changed FOCUS for each image, so when I brought it all back for Elements to put together, elements gave up, and said it wouldn't put them together. So, there is lesson #1: Make sure you set your camera to MANUAL zoom. I had read to make sure your exposure, etc remain the same for each picture, which, from my understanding the A650 does that automatically with the stitch mode. Well, it DOESN’T seem to keep the same focus from shot to shot.

    So, as I am heading back home, I decide to stop off at the park, for a bit, to allow my daughter some time to play around, since she did SO well, standing around, watching me take pictures. While there, I tried a technique that Bryan Peterson suggested in another book I read, where he suggests lying down, and shooting straight up. My daughter was at the top of a piece of playground climbing wall. Dark blue, with a dark blue chain going up. Her arms are outstretched around the chain. That is all you can see. I am laying on my back, and the capture this, in the top about 1/5 of the frame. The rest of the frame is a light blue sky, with a couple of puffy clouds. This shot is amazing. It is not what I went out to shoot, but it turned out great. So, lesson #2: shoot from a different angle, which most others do not shoot from. (That MAY have been lesson #1 in his book: Learning to See Creatively: Design, Color & Composition in Photography.

    At this point, I have read 3 books on photography, and tried to learn as much as I could. Learning to see creatively. As well as Scott Kelby’s books The Digital Photography Book, Volume 1 and The Digital Photography Book, Volume 2. I have a few other books that I am working on reading, right now. Such as the aforementioned Understanding Digital Photography, Understanding Exposure (yes, becoming a Bryan Peterson fan, here), as well as The Betterphoto Guide to Digital Photography. Oh, I am also working on John Shaw’s book: John Shaw's Closeups in Nature . I have always been a big reader. If you are new, and jumping into something, it DOES pay to read about what the top practitioners of your hobby do. That way, you can learn from THEIR mistakes. That is also the focus of this blog… learn from my mistakes, so you can come up with your own original, and exciting ways to mess up a picture. ;-)

    And so it begins.

    I have been kicking this idea around, for a while now. I have finally gotten off my butt, and am doing something about it. This blog is meant to be an exploration of photography, from an amateur’s point of view. Right now, I am using a Canon PowerShot A650 IS. Through the years, I have used an older Canon SLR my mom gave me, so I could take pictures for a photography class in school. My first digital camera, was a $1000 Sony 2.1 MP camera, my then wife and I bought with our tax returns. More recently, I have had a Canon A640, and now this A650.

    These last two cameras have revived my love of photography, that has sat dormant for years. I am coming to realize, I have always had the bug, just never let it out of the bag, so to speak.

    Even though I have not been taking photographs much, I still consider myself an amateur. I have had some formal training, in High School. I have used a darkroom, and developed my own film. I am VERY thankful, we do not do that anymore. I learned a lot, yet what I took away from the class was the feeling of impending dread. It seemed that my projects were ALWAYS behind. From taking the shots, to developing them, to mounting them for the teacher each week. I did ok, but it was not a class I would want to do again. The class was taught by a man that loves the craft, though. He had little anecdotes, the one that still sticks with me, is how he would use his flash to turn off his neighbor's street light, from time to time. To a teenager, the story was quite hilarious, and spoke to the devious side of my nature. He also told us, how the chemicals we were working with.

    I would have to say my mom, is the one that started me down this road. My FIRST real camera, was a little camera that took 110 film. Of course, it was given to me, by my mom, who had been using it, and moved up to a nice Canon SLR camera. About a decade later, this SLR would in turn belong to me, for school. She moved up to a new FANCY 35 mm that actually could auto-focus. :-)

    Well, there it is. As all things have a start, and ending, here is the start. My first post. I look forward to seeing where this hobby, and blog will take me. I hope you enjoy the trip, and maybe learn something new about photography, for yourself.